GitHub Pages 생성
GitHub Pages를 사용해 개인 블로그를 만드는 방법을 알아봅니다.

개요
이 포스팅에서는 GitHub Pages를 생성하는 방법에 대해 소개하고자 합니다.
GitHub 계정생성
GitHub 홈페이지에서 계정생성한다.
GitHub Pages 생성
Pages를 위한 Repository 생성
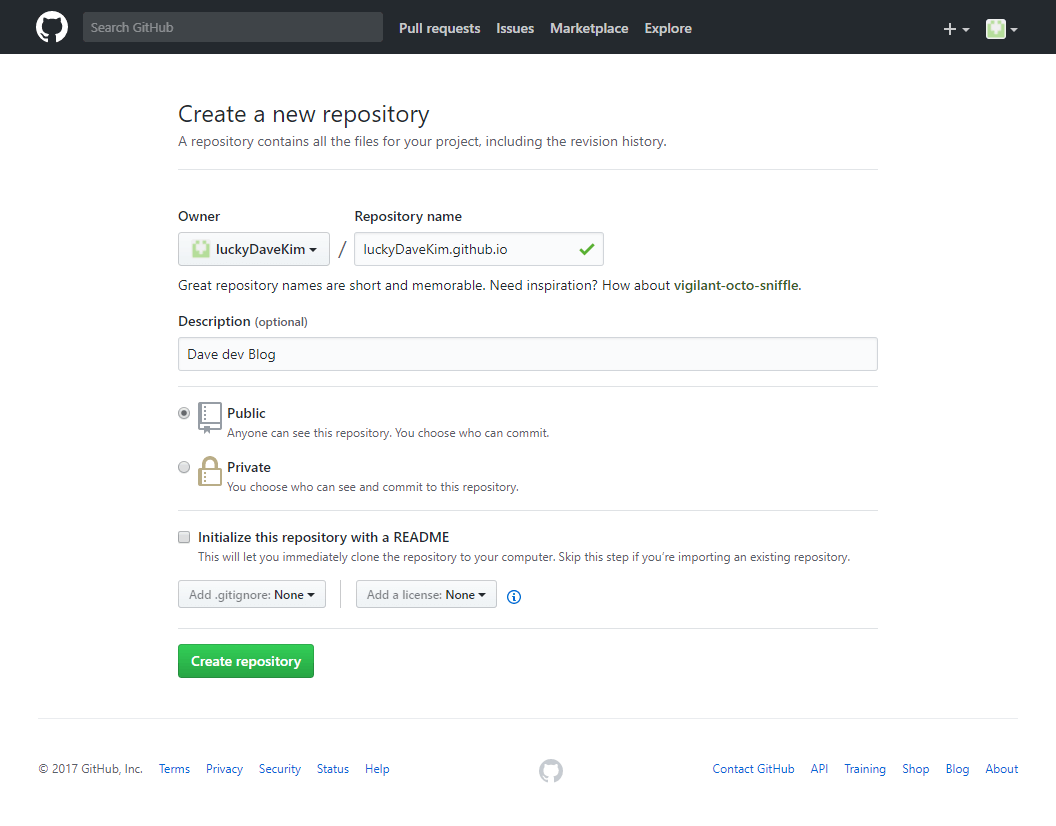
- GitHub Repository 생성에서 repository를 새성한다.
- Repository name에 자신의 github 계정명.github.io
luckyDaveKim.github.io를 기입한다. - (선택) Description에 repository 설명
Dave dev Blog을 기입한다. - Public을 선택한다.
- Create repository를 클릭한다.
HTML, Javascript, CSS 파일 추가
1.Bash 명령어를 통해 github 저장소를 clone 한다.
git clone https://github.com/luckyDaveKim/luckyDaveKim.github.io2.HTML 소스를 작성한다.
github 테스트 페이지3.작성한 소스를 commit 및 push 한다.
git add *
git commit - m "init blog"
git push
자신의 GitHub Pages에 접속
- https://github 계정명.github.io
https://luckyDaveKim.github.io에 접속하여 생성된 github pages를 확인한다.
테마 선택
- Settings탭을 선택한다.
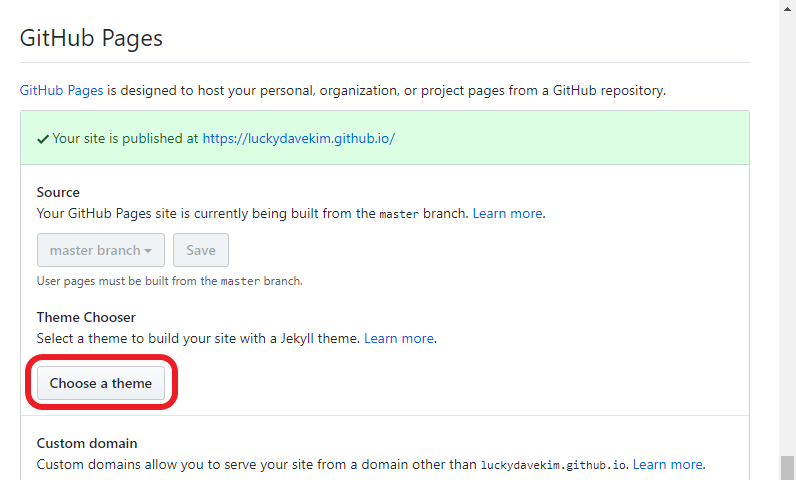
 2. GitHub Pages에서 Choose a theme를 클릭한다.
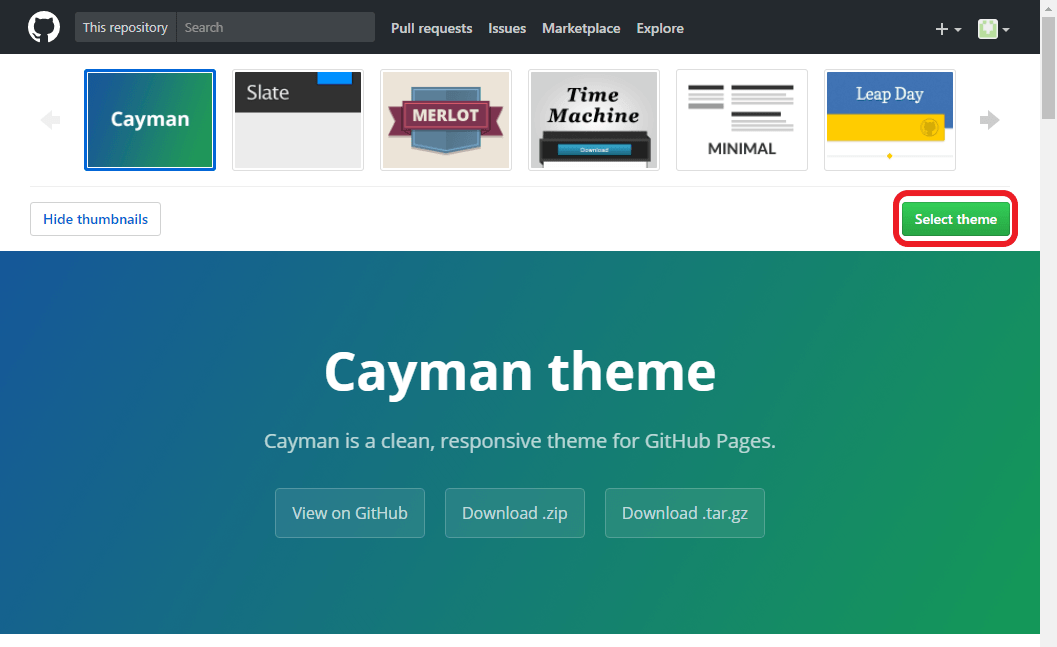
 3. 원하는 테마를 클릭 후 Select theme를 클릭한다.


